

Hari Iyer | SyncEzy
CEO 12 Min Read
 Oct 10, 2022

The heart of your work in Procore is creating & uploading files, working on files, collaborating on files, moving files and deleting files. You also need to consider file permissions across departments, teams, clients, external contractors and others. In this article we’ll look at how to manage files, specifically Documents & Photos, in Procore to maximise efficiency and minimise double-handling & extra admin.
Procore Documents File Management
The common tasks that you’ll perform in Procore are:
- Uploading videos to Procore Documents
- Uploading files to Procore Documents
- Moving files within Procore Documents
- Creating a new folder in Procore Documents
- Renaming a folder in Procore Documents
- Syncing your Procore documents with your cloud storage – Dropbox, Google Drive, OneDrive, SharePoint and Microsoft Teams
- Uploading photos to Procore Photos
- Moving photos within Procore Photos
- Creating a new album in Procore Photos
- Adding comments to a photo in Procore Photos
- Syncing your Procore photo albums with your cloud storage – Dropbox, Google Drive, OneDrive, SharePoint and Microsoft Teams
We’ll now look at how you can manage your team’s documents and photos within Procore and within your cloud storage provider of choice.
Uploading videos to Procore Documents
You’ve taken a video on-site and want to share it with your team. Follow these steps to help you understand how to upload your video to Procore on your desktop and have your files synced to your cloud storage:
- Navigate to the project’s Documents tool.
- Click to select the folder you want to upload your video to, or create a new folder.
- Drag and drop the video file from your computer to the centre panel of the Documents tool.
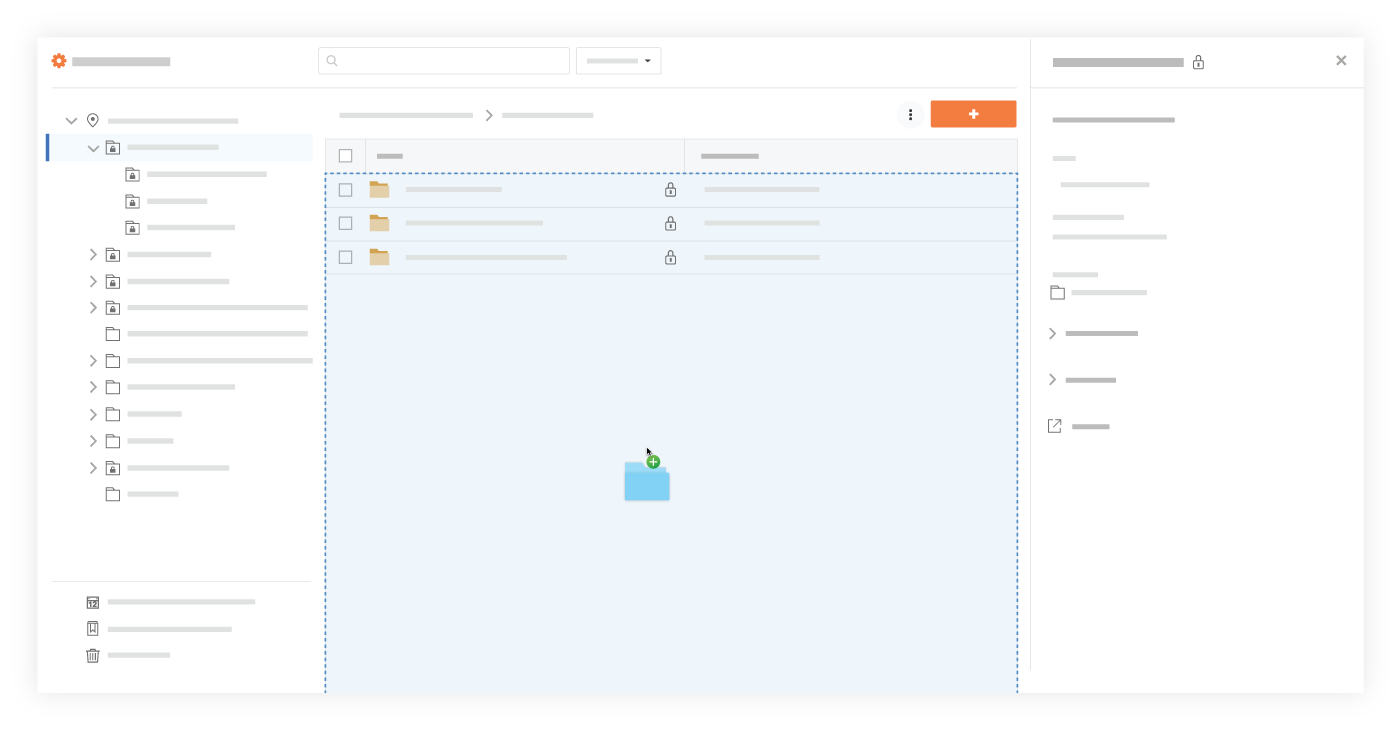
OR- Click the + New drop-down menu.
- Click File Upload.
- Select the files or folders you want to upload from your computer.
- Click Open.
- Click Upload.
Note: Uploaded .MP4 videos can be viewed in the Documents tool by clicking the play icon on the video preview. Uploading a video to Procore on your mobile or tablet? To upload a video on your Apple device, follow these instructions. For an Android device, follow these instructions.
Once you’ve uploaded your video, your video will sync across to your cloud storage of choice so your team and non-Procore users can watch the video.
Uploading files to Procore Documents
If you’re looking for instructions on uploading files or folders to Procore Documents, follow these steps:
- Navigate to the Documents tool.
- Click on the folder in the Documents tool that you want to upload files or folders to.
- After selecting files or folders on your computer, drag and drop them to the centre panel of the Documents tool.
Tip! You can also use this method to upload empty folders from your computer instead of having to create the same folders manually in the Documents tool.
OR- Click the + New drop-down menu.
- Choose whether you want to upload files or folders:
- Click File Upload to select files to upload.
- Click Folder Uploadto select folders to upload.
- Select the files or folders you want to upload from your computer.
Note: Empty folders cannot be uploaded during this step. They can only be uploaded using the drag-and-drop method shown above. - Click Open.
Notes:- A progress indicator is shown for each upload, and the system returns to the Documents tool page after the upload is complete.
- If you are uploading one or more files with the same filename as an existing file, you are prompted to choose whether you want to upload them as new versions, or rename the files.
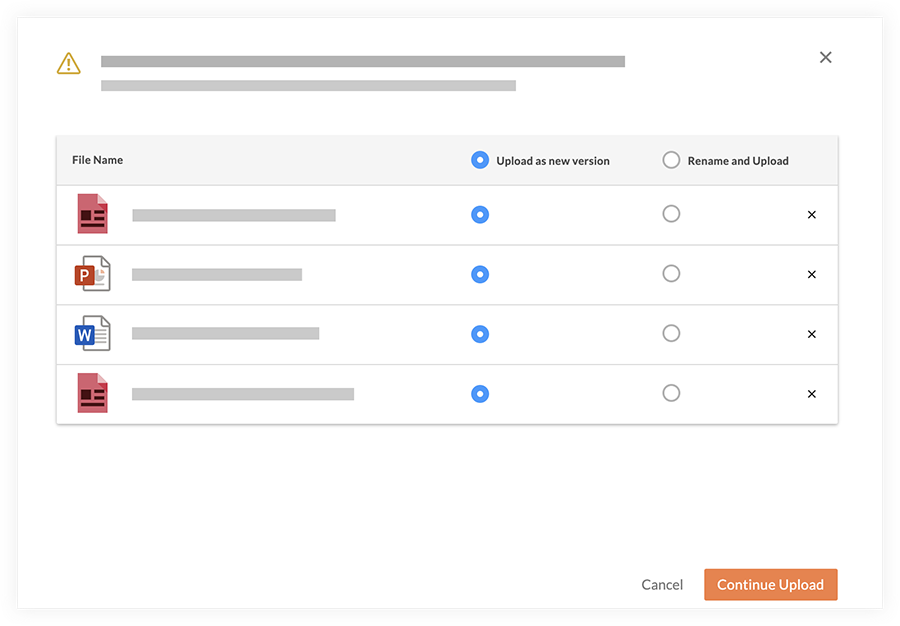
- Click Continue Upload.
Uploading files to Procore on your mobile or tablet? To upload files on your Apple device, follow these instructions. For an Android device, follow these instructions.
Once you’ve uploaded your file/s, your file/s will sync across to your cloud storage of choice so your team and non-Procore users can view the files & folders.
Moving files within Procore Documents
If you’ve uploaded files and want to move them to a new location (perhaps a common folder that is synced with your cloud storage), follow these steps:
- Navigate to the Documents tool.
- Mark the checkboxes next to the files or folders you want to move.
- Right-click on the selection and click
 Move to.
Note: This action can also be clicked from the banner, or after clicking the vertical ellipsis icon. - In the window, click to select the folder you want to move the documents to.
- Click Move.
Once you’ve moved your files, your files will sync across to your cloud storage of choice so your team and non-Procore users can view the files in their new location.
Creating a new folder in Procore Documents
Need to create a new folder in Procore? Follow these steps (your new folder will sync across to your cloud storage of choice):
- Navigate to the Documents tool.
- Click to select the folder to you want to add a subfolder to.
Note: If you want the new folder to appear under your project’s root folder, select the top-most folder with your project’s name. - Click the + New drop-down menu.
- Click Create Folder.
- Enter a name for your folder.
- Click Create.
Creating a new folder in Procore on your mobile or tablet? To create new folders on your Apple device, follow these instructions. For an Android device, follow these instructions.
Renaming a folder in Procore Documents
There are times you need to rename your folders in Procore. Follow these steps to rename your folders on your desktop:
Folders can be renamed from the folder tree, centre panel, or the Information side panel.
FROM THE FOLDER TREE:
- Navigate to the Documents tool.
- Locate the folder you want to rename.
- Right-click on the folder and click
 Rename.
Note: You can also access this action by clicking the vertical ellipsis icon while the folder is selected.
 - Enter an updated name for the folder.
- Click Done.
Note: The folder will automatically reflect the updated name.
FROM THE INFORMATION PANEL:
- Navigate to the Documents tool.
- Locate the folder you want to rename.
- Select the folder and click Info
 to open the Information panel.
 - Click into the Title field.
- Enter an updated name for the folder.
- Click out of the field to save your changes.
Note: The folder will automatically reflect the updated name.
Syncing your Procore documents with your cloud storage
In almost all organisations, their cloud storage solution is the central source of truth for all documents. One of the strengths of having files stored in cloud storage is that staff can follow the same procedures for file sharing that they follow for all internal files. Through our integration with Dropbox, Google Drive, OneDrive, SharePoint and Microsoft Teams, you can have your Procore Documents and Photos synced across to team folders, client folders or any other internal folder structure. To see if this would be a good fit for your company, speak to our sales team today.
Uploading photos to Procore Photos
Procore has a solid Photo tool that makes it easy to capture progress photos, add markups and other site photos. To upload photos on your desktop, follow these steps:
Drag-and-Drop Photos to Upload
- Navigate to your project’s Photos tool.
- Drag a photo from your computer’s file tree or desktop and drop it into the Photos tool anywhere on the page.
Note: Photos will be uploaded to the location in the Photos tool which you are viewing. - Fill out the fields in the upload modal as necessary.
- Date: This field will automatically populate with the dates that the photos were taken. If the capture information was not recorded when the photo was taken, the photos will default to today’s date.
- Location: Select a location associated with the photo(s).
- Album: Select which album into which you want to upload the photos.
- Trade: Select the trade associated with the photo(s).
- Private: Mark the checkbox if you want to hide the photo(s) from anyone but users with ‘Admin’ level permissions on the Photos tool.
- Add to Daily Log: Mark the checkbox if you want these photos to be uploaded into the Daily Log for the day the photos were taken (or today’s date if capture information was not recorded).
- Click Upload Photos.
Select Photos to Upload
- Navigate to your project’s Photos tool.
- Click the Upload button.
- Browse your computer’s file tree.
- Select files from your local computer.
- Click Open.
- Fill out the fields in the upload modal as necessary.
- Date: This field will automatically populate with the dates that the photos were taken. If the capture information was not recorded when the photo was taken, the photos will default to today’s date.
- Location: Select a location associated with the photo(s).
- Album: Select which album into which you want to upload the photos.
- Trade: Select the trade associated with the photo(s).
- Private: Mark the checkbox if you want to hide the photo(s) from anyone but users with ‘Admin’ level permissions on the Photos tool.
- Add to Daily Log: Mark the checkbox if you want these photos to be uploaded into the Daily Log for the day the photos were taken (or today’s date if capture information was not recorded).
- Click Upload Photos.
Taking photos on your mobile or tablet and want them stored in a Procore album? To take photos & store them on your Apple device, follow these instructions. For an Android device, follow these instructions.
Once you’ve uploaded your photos, your photos will sync across to your cloud storage of choice so your team and non-Procore users can view them.
Moving photos within Procore Photos
There are times when photos may need to be moved to another photo album. For example, when photos are emailed into Procore using a project’s unique email address (e.g. upload-1234-project-name@procoretech.com), they are automatically placed in the project’s ‘Unclassified’ folder. The email address is especially useful for giving project collaborators the ability to upload photos to a project, even if they do not have access to the project’s Photos tool. Additionally, photos uploaded from the mobile app will default to the ‘Unclassified’ album if another album is not selected. To move photos in Procore, follow these steps:
TO MOVE MULTIPLE PHOTOS
- Navigate to the project’s Photos tool.
- Locate the photos you want to move to another album.
- Hover over and mark the checkbox on each photo you want to select.
- Click the Bulk Actions drop-down menu.
- Click Bulk Edit.
- Click the drop-down menu under Album.
- Select the album you want to move the photos to.
- Click Update.
TO MOVE AN INDIVIDUAL PHOTO
- Navigate to the project’s Photos tool.
- Locate the photo you want to move.
- Click the photo to open it in the photo viewer.
- Click the vertical ellipsis
 icon.
icon. - Click Change Album.
- Select the album you want to move the photo to.
- Click Confirm.
Creating a new album in Procore Photos
Need to create a new album that will sync across to your cloud storage of choice? Follow these instructions to create a new photo album in Procore on your desktop:
- Navigate to your project’s Photos tool.
- Click the Albums tab.
- Click the + Create Album button.
- Enter a name for the album.
- Click Create.
Need to create a Procore photo album on your mobile or tablet? To create a new album on your Apple device, follow these instructions. For an Android device, follow these instructions.
Once you’ve created your album, your album will sync across to your cloud storage of choice so your team and non-Procore users can view the photos in this album.
Adding comments to a photo in Procore Photos
Want to add a comment to a photo in Procore and notify someone of the comment? Follow these steps on your desktop:
- Navigate to the project’s Photos tool.
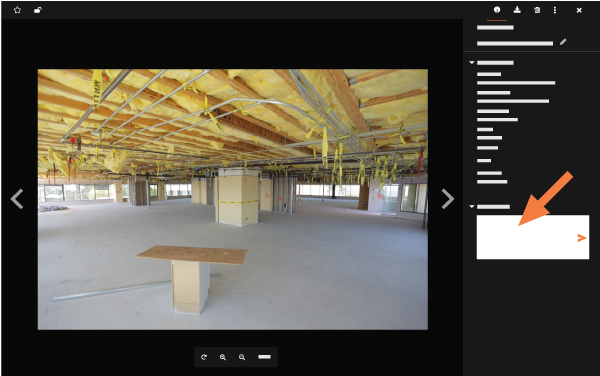
- Click the photo you want to add a comment to.
- Click the information (i) icon if it is not already selected.
- Expand the ‘Comments’ section at the bottom of the Information section.
- Enter your comment in the text box that appears.
 Note: You can also Mention Someone in a Photo Comment.
 - Click the Send arrow icon.
- Optional: You cannot edit a comment, but if you have ‘Admin’ permissions to the Photos tool, you can remove your comment by clicking the ‘x.’
Want to add a comment to a photo on your mobile or tablet? To add a comment on your Apple device, follow these instructions (or follow these instructions to add a markup on iOS). For an Android device, follow these instructions (or follow these instructions to add a markup on Android).
Syncing your Procore photo albums with your cloud storage
In almost all organisations, their cloud storage solution is the central source of truth for all photos & albums. One of the strengths of having Procore images stored in cloud storage is that staff can follow the same procedures for file sharing that they follow for all internal files. Through our integration with Dropbox, Google Drive, OneDrive, SharePoint and Microsoft Teams, you can have your Procore Documents and Photos synced across to team folders, client folders or any other internal folder structure. To see if this would be a good fit for your company, speak to our sales team today.
Author
Hari Iyer | SyncEzy
CEO

Hari Iyer is the Founder and CEO of SyncEzy, a pioneering company at the forefront of data integration and automation solutions. With a deep understanding of the power of technology and a passion for solving complex business challenges, Hari has emerged as a visionary leader in the industry. His relentless pursuit of excellence and commitment to delivering tangible results have earned SyncEzy a loyal global clientele.
He is not only a successful entrepreneur but also an active contributor to the technology community, sharing his insights through thought leadership articles, speaking engagements, and mentorship programs. Hari’s ability to navigate the complexities of remote work serves as an inspiration for leaders, highlighting the importance of flexibility, work-life balance, and a results-oriented approach in today’s evolving work landscape.
Under his guidance, SyncEzy has gained widespread recognition for its deep integration solutions that seamlessly connect software applications, eliminate data silos, and enhance operational efficiency.
When not working, Hari is trying to be a better father, reading tech news, playing FPS games, and not exercising as he should.
Related Posts


Categories
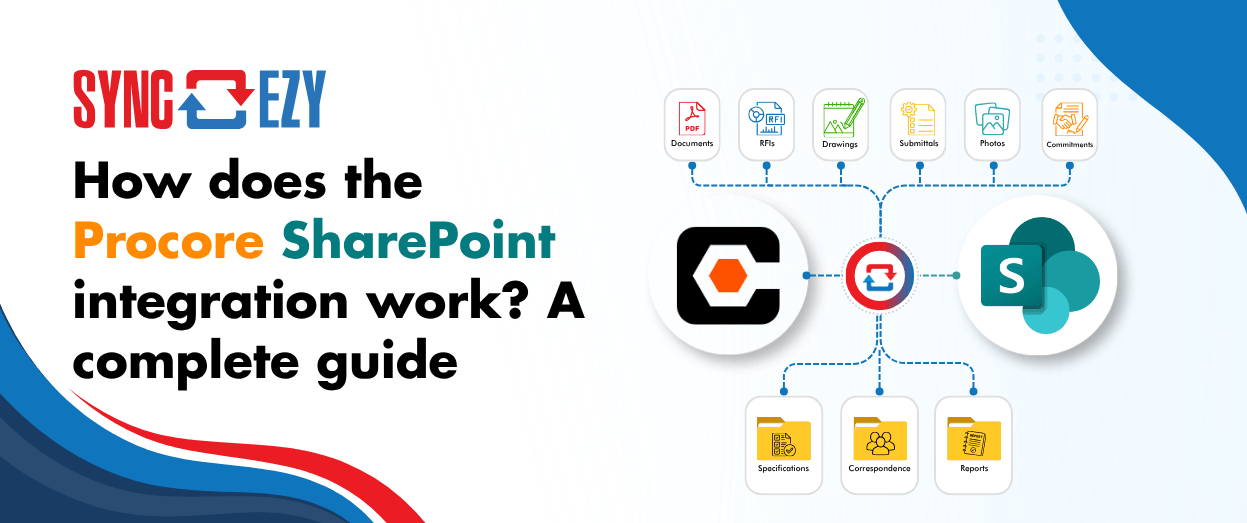
How does the Procore SharePoint integration work? A complete guide
If you’re running Procore on the project side and SharePoint (or OneDrive) on the business side, you’re probably managing a version problem. Documents live in both places, and at any given moment you’re not certain which one is current. Field teams work in Procore. Office teams work in SharePoint. Someone always ends up uploading the… Continue reading How does the Procore SharePoint integration work? A complete guide
Hari Iyer | SyncEzy
CEO
Stop Chasing Documents: How Procore and Box Sync to Become a Single Source of Truth
Most construction and field-services businesses we talk to don’t have one big, dramatic document problem. They have a quiet, persistent one. The site team works in Procore, because that’s where the project lives. The office team works in Box, because that’s where the company’s documents live. And somewhere in the middle sits a person, or… Continue reading Stop Chasing Documents: How Procore and Box Sync to Become a Single Source of Truth
Hari Iyer | SyncEzy
CEO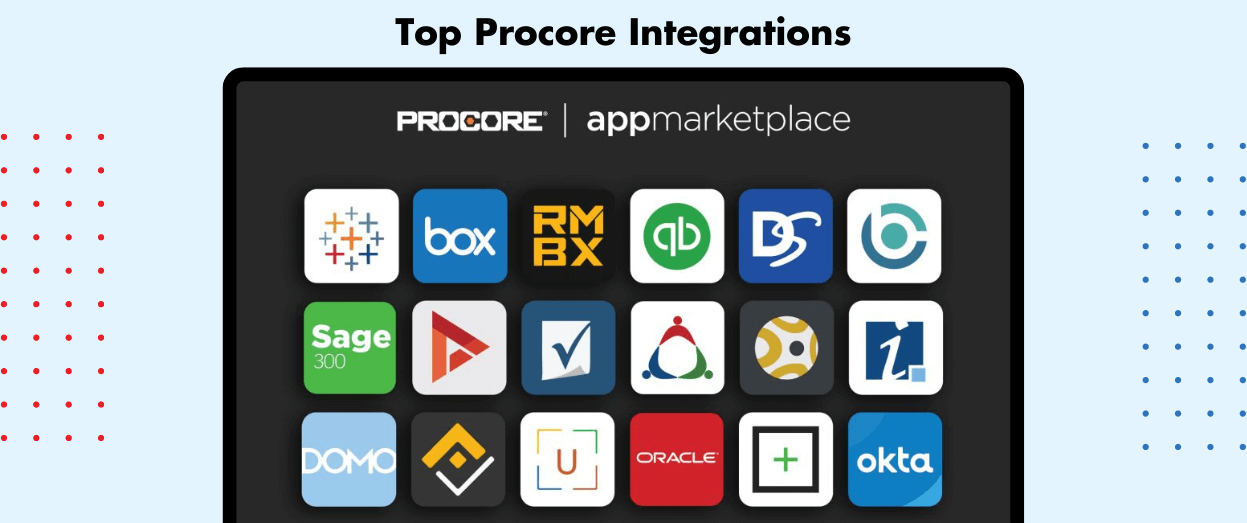
Top Procore Integrations
What is Procore? Procore is the world’s leading cloud-based construction management software. Over 600,000 people at more than 6,300 companies worldwide use Procore’s solutions to manage their projects and deliver quality results. It provides construction companies with a single system of record for project data, and automates the workflows used by owners, contractors and subcontractors… Continue reading Top Procore Integrations
Hari Iyer | SyncEzy
CEO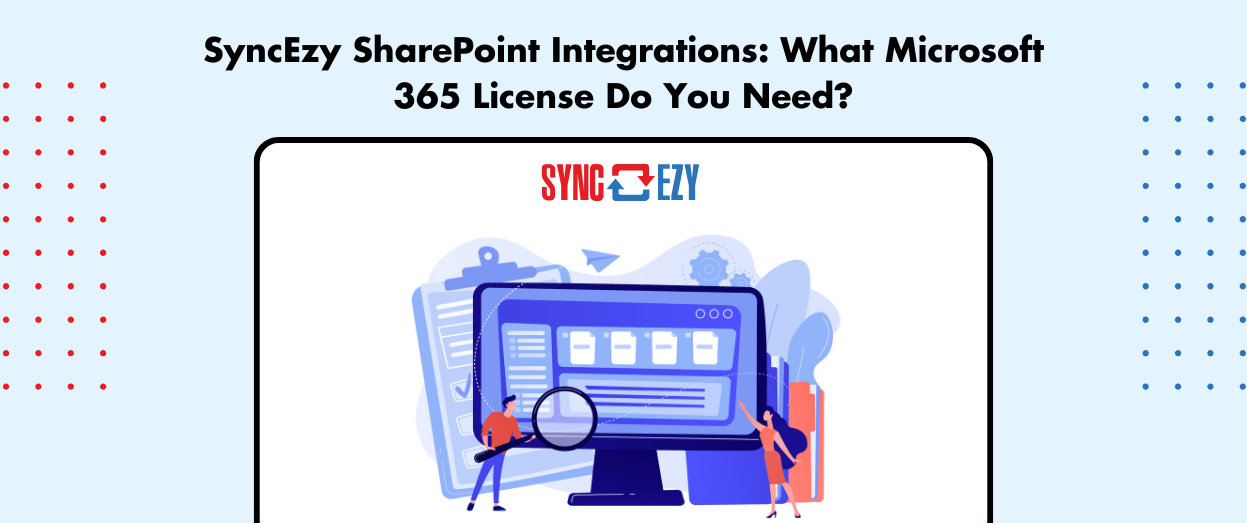
SyncEzy SharePoint Integrations: What Microsoft 365 License Do You Need?
SharePoint is often the system of record for documents such as policies, drawings, SOPs, contracts, and compliance files. SyncEzy integrates SharePoint with platforms like Procore, Simpro, SafetyCulture, Autodesk Construction Cloud, Employment Hero, and Zoho, ensuring documents stay in sync across systems automatically. The Short Answer Microsoft 365 Business Basic is sufficient. SyncEzy works with the… Continue reading SyncEzy SharePoint Integrations: What Microsoft 365 License Do You Need?
Hari Iyer | SyncEzy
CEO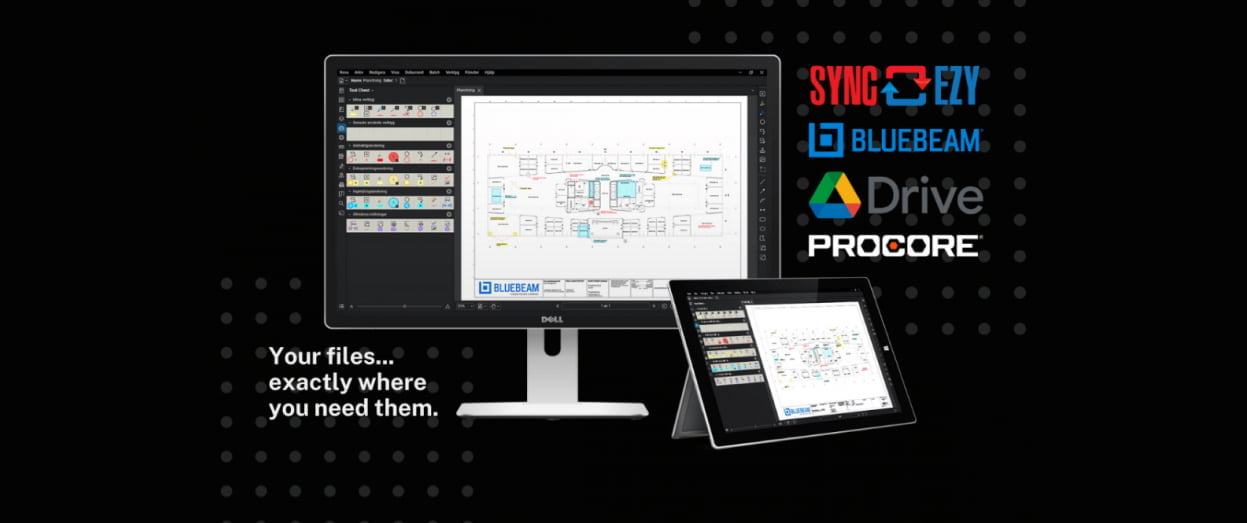
How to share Bluebeam files in Procore
Bluebeam software users love the ability to create customisable markups and manage site logistics plans. Bluebeam Revu can also be used for: The challenge for Bluebeam users who also use Procore is how to share files and markups in the most efficient way. Bluebeam currently has a basic Procore integration that has the following features:… Continue reading How to share Bluebeam files in Procore
Hari Iyer | SyncEzy
CEO
Procore Marketplace
In February 2016, Procore launched its equivalent of the App Store or Extension marketplace, called the Procore App Marketplace with 20 Procore apps. As they describe, “The App Marketplace is the online home for all third-party solutions and applications that integrate with the Procore platform. Companies of varying sizes and focus areas can easily locate… Continue reading Procore Marketplace
Hari Iyer | SyncEzy
CEO