

Hari Iyer | SyncEzy
CEO 11 Min Read
 Oct 11, 2022
A large part of your work in Procore is collaborating on files and photos with internal and external stakeholders across departments, teams, clients, external contractors and others. In this article we’ll look at how to set up Procore sharing, specifically Documents & Photos, in Procore to ensure that the right people are the only ones accessing the right files at the right time. If you need a detailed overview of user permissions and who can access each particular feature within Procore, based on the role you assign them, check out this helpful permissions table (also available for checking Procore mobile permissions). You’ll also find information on Procore’s permission levels (None, Read Only, Standard, and Admin), that define what actions users can perform and what information they can view in each Procore tool.

Sharing Procore Files
The most common reasons for sharing Procore files are:
- Sharing Procore files within your company
- Sharing Procore files from a project with all internal staff
- Only share Procore files with a specific team in your company
- Only share Procore files from one project
- Giving a team member limited access to a specific Procore tool
- Share Procore Project files with people not using Procore
- Share a folder of Documents from a Procore project with external users
- Share an album of Procore photos with non-Procore users
Sharing Procore files within your company
If you’re in a smaller company or a company where sharing internal files with everyone is common, then you can follow the below steps to enable company-wide access to Procore files. The steps to sharing your Procore files with all internal users are:
- Navigate to the company’s Permissions tool.
- Click the Company Permissions Templates tab.
- Click +Create Company Permissions Template.
- In the ‘Create Company Permissions Template’ window, enter a name for the company permissions template and click Confirm.
You are redirected to the ‘Edit Template’ page for your new company permissions template.
To edit these company-wide Procore permission settings, follow the below steps:
- Navigate to the company’s Permissions tool.
- Click the Company Permissions Templates tab.
- Click Actions and select ‘Edit Template’ next to the permissions template you want to edit.
- On the ‘Edit Template’ page, click the pencil icon to change the permissions template’s name.
- For each Company level Procore tool row in the table, select the button under one of the following columns:
- None. Grants no access to the Procore tool. This is the default setting for all Company level tools (except the company’s Portfolio tool) on newly created permission templates.
- Read Only. Grants read-only access to the Procore tool. This is the default setting for the company’s Portfolio tool. When this option is selected for a tool that supports granular permissions, the tool’s granular permissions options display.
- Standard. Grants standard access to the Procore tool. When this option is selected for a tool that supports granular permissions, the tool’s granular permissions options display.
- Admin. Grants admin access to the Procore tool.
- Click Save and select Save or Save & Return to Company Permissions.
Sharing Procore files from a project with all internal staff
Procore has the ability to grant access to people based on their role, Role-based Permissions (RBP), and grant access to selected people to company or Project files.
If you decide not to share all Procore company files but assign access to individual Procore projects, follow these steps to set it up:
- Navigate to the company’s Permissions tool.
- Click the Project Permissions Templates tab.
- Click +Create Project Permissions Template and select Project (Specific) – Assignable to a Specific Project.
- Enter a name for the template in the ‘Create Project Specific Permissions Template’ window and click Confirm.
- On the ‘Select Project to Assign to Template’ page, click Select next to the project you want to create a new permissions template for.
You are redirected to the ‘Edit Template’ page for your new permissions template.
To edit a user’s Procore permission settings, follow the below steps:
- Navigate to the project’s Directory tool.
- Click the Users tab.
- Locate the desired user in the list.
- Click Edit.
This opens the user’s Edit Contact Information page. - Scroll down to the ‘Project Permissions Templates’ area.
The drop-down list contains a list of global permissions templates and project specific permissions templates that can be applied to the user’s profile. - Choose from these options:
Only share Procore files with a specific team in your company
To share Procore files only with a specific team within your company, you can grant permission on a project-level basis. Follow the steps above to set up role-based permissions based on a project-specific permission template.
Only share Procore files from one project
To share Project files for a single Procore project, follow these steps:
- Navigate to the company’s Permissions tool.
- Click the Project Permissions Templates tab.
- Click +Create Project Permissions Template and select Project (Specific) – Assignable to a Specific Project.
- Enter a name for the template in the ‘Create Project Specific Permissions Template’ window and click Confirm.
- On the ‘Select Project to Assign to Template’ page, click Select next to the project you want to create a new permissions template for.
You are redirected to the ‘Edit Template’ page for your new permissions template.
If you want to re-use these Procore permission settings across future projects, follow these steps to duplicate your settings;
- Navigate to the company’s Permissions tool.
- Click the Project Permissions Templates tab.
- Click Actions and select ‘Duplicate’ next to the permissions template you want to duplicate.
- In the ‘Duplicate Project Permissions Template’ window, complete the following:
- Enter name for the new permissions template.
- Select the button next to ‘Create Global Template’ or ‘Create Project Specific Template’.
- Click Confirm.
You are redirected to the ‘Edit Template’ page for the new permissions template and a green banner displays to confirm the template was duplicated.
Giving a team member limited access to a specific Procore tool
There are times that you’ll want to give team members access to the files within a specific Procore tool but want to limit what they can do within that tool. If you need more control over your Procore permission levels (beyond None, Read Only, Standard, and Admin), you’ll need to grant Granular Permissions to specific tools. After you’ve created a Project Permissions template, follow the below steps to set up your granular permissions:
- Navigate to the company’s Permissions tool.
- Click the Project Permissions Templates tab.
- Click Actions next to the template you want to grant granular permissions for and select Edit Template.
- Select the button in the Read Only or Standard column on the row for the supported tool you want to grant granular permissions for.
- Click the angle bracket > icon to open or close the granular permissions menu for each supported tool.
Note: This icon only displays when the button for Read Only or Standard is selected. - Mark the ‘Turn ALL ON’ checkbox to enable all of a supported tool’s granular permissions on the permissions template.
Note: This checkbox name changes to ‘Turn ALL OFF’ if all of a supported tool’s granular permissions are enabled.
OR
Mark the checkbox for each granular permission you want to enable on the permissions template for one or more of the following tools: - Click Save.
As an example of the granular permission you can set in Procore tools, we’ll look at granular permissions in the Documents and Photo tools.
For Documents, you can give users access to:
- Access Private Folders and Files
- Rename Folders and Files
- Move and Copy Files and Folders
- Set Permissions
- Delete Folders and Files
- See Recycle Bin
Within the Photos tool, you can give users access to:
- Delete a Photo Album
- Change the Order of Photo Albums
- View Private Photos
- Create a Photo Album

Share Procore Project files with people not using Procore
There will be time when you want to share Procore files with people who don’t use Procore. They might be members of your team who don’t use Procore on a day-to-day basis or may be external stakeholders (clients. contractors etc) who need access to Procore Project files. Procore doesn’t have a built-in feature to allow access to external users but you can use an integration with Dropbox, Google Drive, OneDrive, SharePoint or Microsoft Teams to give clients access. By setting up this integration, you can have your Procore Documents and Photos synced across to team folders, client folders or any other internal folder structure. Select the cloud storage folder, click Share, set permissions (view, comment or edit) and your external user will get the exact access they need.
As an example, you can follow these steps to share a Dropbox file or folder through their website, via your desktop or via their mobile app:
On Dropbox.com
- Sign in to dropbox.com.
- Hover over the file or folder you’d like to share and click the share icon (rectangle with an up arrow).
- Type the Email, name, or group of the person (or people) you’d like to share with, and click to select them from the results.
- Note: You can add as many people as you’d like.
- Select Can edit or Can view.
- Add a note if you’d like, and check the checkbox if you’d like to Post this note as a comment.
- Click Share file or Share folder.
The person or group will receive an email with a link to the file or folder.
On the Dropbox desktop app
- Open the Dropbox folder in File Explorer (Windows) or Finder (Mac).
- Right-click or command-click the file or folder you’d like to share.
- Click Share….
- Type the Email, name, or group of the person (or people) you’d like to share with, and click to select them from the results.
- Note: You can add as many people as you’d like.
- Select Can edit or Can view.
- Add a message if you’d like.
- Click Share.
The person or group will receive an email with a link to the file or folder.
On the Dropbox mobile app
- Open the Dropbox mobile app.
- Tap the “⁝”(vertical ellipsis on Android) or “…” (ellipsis on iPhone/iPad) next to the file or folder you’d like to share.
- Tap Share.
- Tap Invite to file.
- Tap under Send to and type the Email, name, or group of the person (or people) you’d like to share with.
- Tap to select them from the results.
- Note: You can add as many people as you’d like.
- Tap to select Can edit (view, comment, and edit), Can view (view and comment but not edit), or View-only (view only — they can’t see comments).
- Tap Message (optional) to add a message if you’d like.
- Tap Share.
Share a folder of Documents from a Procore project with external users
Sharing a folder of Documents can be set up by following the above steps. Set up your Procore integration with Dropbox, Google Drive, OneDrive, SharePoint or Microsoft Teams to be able to share specific folders with the people or teams you need.
Share an album of Procore photos with non-Procore users
Sharing Procore site photos with clients and manager is as simple as setting up the Procore integration with Dropbox, Google Drive, OneDrive, SharePoint or Microsoft Teams then starting the sync. You’ll be able to choose your Procore photo album in your cloud storage folders and share this with view-only, comment or edit permissions.
Sharing your Procore Documents and Photos
In almost all organisations, their cloud storage solution is the central source of truth for all documents, photos & albums. One of the strengths of having Procore files & images stored in cloud storage is that staff can follow the same procedures for file sharing that they follow for all internal files. Through our integration with Dropbox, Google Drive, OneDrive, SharePoint and Microsoft Teams, you can have your Procore Documents and Photos synced across to team folders, client folders or any other internal folder structure. To see if this would be a good fit for your company, speak to our sales team today.
Author
Hari Iyer | SyncEzy
CEO

Hari Iyer is the Founder and CEO of SyncEzy, a pioneering company at the forefront of data integration and automation solutions. With a deep understanding of the power of technology and a passion for solving complex business challenges, Hari has emerged as a visionary leader in the industry. His relentless pursuit of excellence and commitment to delivering tangible results have earned SyncEzy a loyal global clientele.
He is not only a successful entrepreneur but also an active contributor to the technology community, sharing his insights through thought leadership articles, speaking engagements, and mentorship programs. Hari’s ability to navigate the complexities of remote work serves as an inspiration for leaders, highlighting the importance of flexibility, work-life balance, and a results-oriented approach in today’s evolving work landscape.
Under his guidance, SyncEzy has gained widespread recognition for its deep integration solutions that seamlessly connect software applications, eliminate data silos, and enhance operational efficiency.
When not working, Hari is trying to be a better father, reading tech news, playing FPS games, and not exercising as he should.
Related Posts


Tags
Categories

Understanding Procore Emails
For most office staff, email management is one of the most important tasks they perform each day. In this article, we’ll look at how emails work in Procore and how you can: Procore Emails Send an email with an attachment from Procore The Emails tool in Procore lets you perform basic email functions, such as… Continue reading Understanding Procore Emails
Hari Iyer | SyncEzy
CEO
Understanding Procore Downloads
Procore Downloads As a Procore user, you’re going to need to download files from Procore on your desktop or mobile. You might want to download the Procore files so you can mark them up, import into another software program, post to a group chat or email to a colleague. In this article, we’ll look at… Continue reading Understanding Procore Downloads
Hari Iyer | SyncEzy
CEO
Understanding Procore Documents
Procore’s Company level Documents tool is one place to house your organization’s mission-critical documents. Designed to accelerate business efficiency, this tool minimizes the amount of time it takes to capture, distribute, and share documents with your team. In this article, we’ll look at how companies are using this construction document management software and the smart… Continue reading Understanding Procore Documents
Hari Iyer | SyncEzy
CEO
odrive Alternative
For companies looking to connect Procore to their cloud storage provider, there are only a few major players in the Procore integration space. odrive is a service that enables you to integrate with Procore and “connect” your files to odrive. The way the connection works is: By having all your file as links to be… Continue reading odrive Alternative
Hari Iyer | SyncEzy
CEO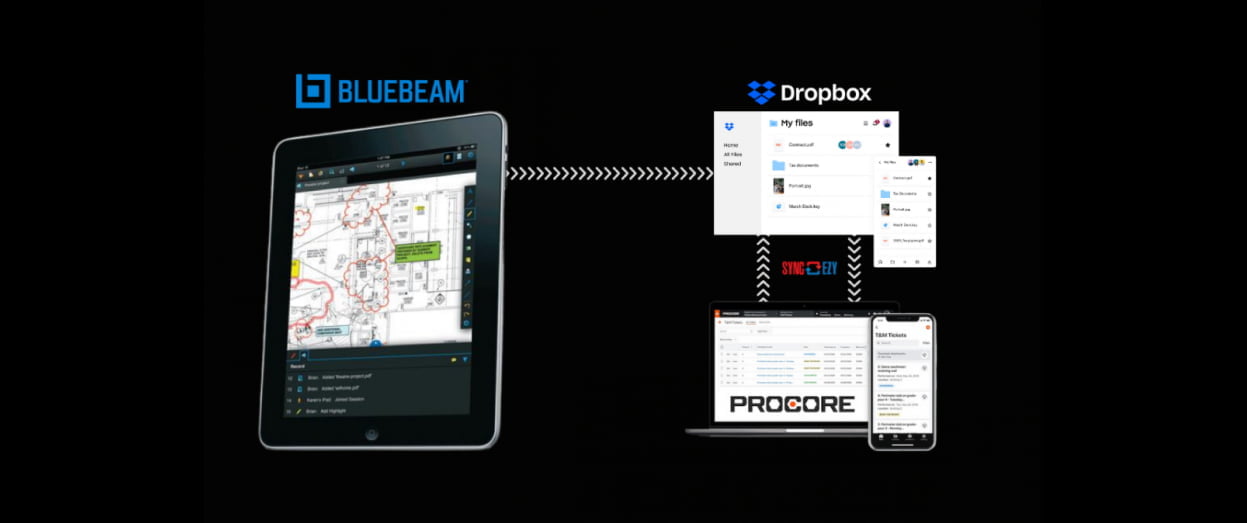
Sync Bluebeam files to Procore
Want to connect Bluebeam to Procore? After working with Procore users, we know that many love using Bluebeam in their business for document markups and collaboration. They can use Bluebeam on their desktops and iPads then download/share the PDF with others in their business via email. The problem with this workflow is that file versions… Continue reading Sync Bluebeam files to Procore
Hari Iyer | SyncEzy
CEO
Top 8 reasons to backup your construction files & photos to the cloud
Want to access your construction project files from anywhere? In this article we look at the top 8 reasons to backup your construction files & photos to the cloud. Ready to access your construction project files easily? We offer a Procore to Dropbox integration that ticks all the boxes for backing up your files. Get… Continue reading Top 8 reasons to backup your construction files & photos to the cloud
Hari Iyer | SyncEzy
CEO