Hari Iyer | SyncEzy
CEO9 Min Read
Aug 28, 2022

Procore’s Company level Documents tool is one place to house your organization’s mission-critical documents. Designed to accelerate business efficiency, this tool minimizes the amount of time it takes to capture, distribute, and share documents with your team. In this article, we’ll look at how companies are using this construction document management software and the smart ways that teams are sharing their Procore Documents with their staff and other stakeholders.
How to upload or email files into Procore
Files (documents and photos) can be uploaded individually in the Documents Tool or they can be emailed as attachments to a unique email address setup for each project. Files can be sent from any email system, including mobile devices.
Uploading new files into Procore using the Documents tool
- Navigate to the Company level Documents tool.
- Click on the folder in the Documents tool that you want to upload files or folders to.
- After selecting files or folders on your computer, drag and drop them to the centre panel of the Documents tool.
Tip! You can also use this method to upload empty folders from your computer instead of having to create the same folders manually in the Documents tool.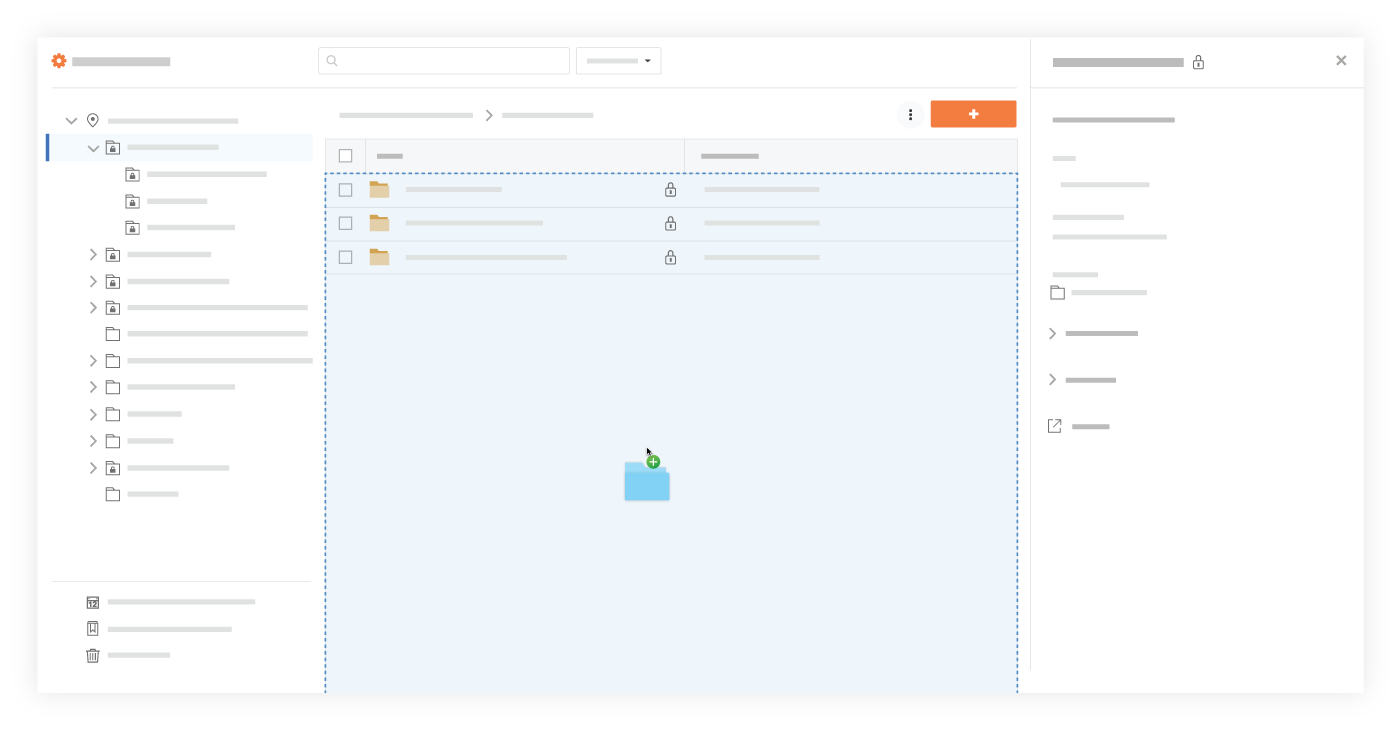
OR- Click the + New drop-down menu.
- Choose whether you want to upload files or folders:
- Click File Upload to select files to upload.
- Click Folder Uploadto select folders to upload.
- Select the files or folders you want to upload from your computer.
Note: Empty folders cannot be uploaded during this step. They can only be uploaded using the drag-and-drop method shown above. - Click Open. Notes: A progress indicator is shown for each upload, and the system returns to the Documents tool page after the upload is complete. If you are uploading one or more files with the same filename as an existing file, you are prompted to choose whether you want to upload them as new versions, or rename the files.
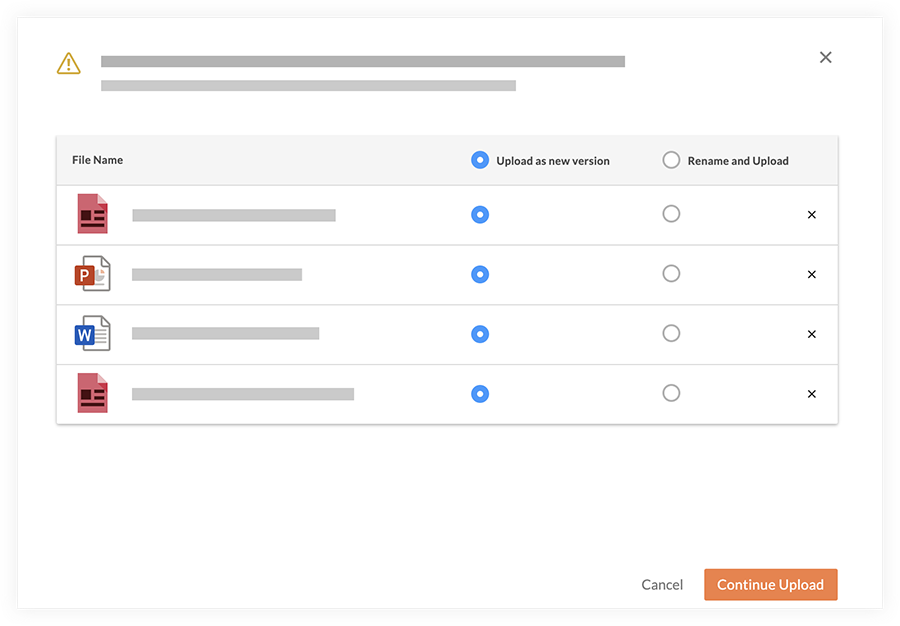
- Click Continue Upload.
Uploading new files into Procore using an integration
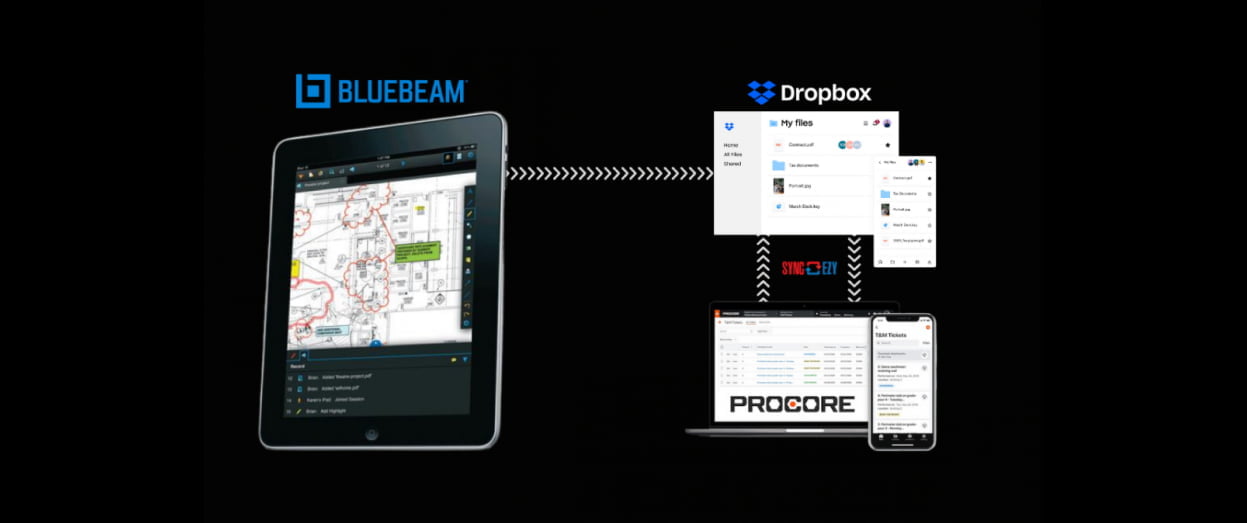
There are several integrations that you can use to connect your construction document management software to remote file storage apps. If you store your company files in Dropbox, Google Drive, OneDrive, SharePoint or Microsoft Teams, you’ll be able have your company files automatically synced with your Procore Documents. The process for adding files to Procore Documents is simplified as you can either upload your files directly via the web version of Dropbox, Google Drive, OneDrive, SharePoint, Microsoft Teams or you can upload your files via Windows Explorer and have the files automatically sync across to Procore Documents.
Uploading new files into Procore Documents using email
- Navigate to the Documents tool.
- Click the Configure Settings icon.
- The email address to email files to is listed in the ‘To Email Files To This Project’ section.

- Create an email that is addressed to your Documents tool’s email address (mentioned above).
- Attach any files you want to add to the Documents tool to the email. Note: The files will be uploaded to the ‘Emailed Documents’ folder.
Uploading new files into Procore Emails tab using email
- Navigate to the Documents tool.
- Locate the file or folder you want to create an email communication for.
- Click the info
 icon to expand the information panel.
 - Click Emails to open the Emails window.
- The unique email address for the document is listed in the banner.

All emails sent to this address will appear in this section when viewing the file or folder.
Uploading a new version of a file into Procore (one at a time)
- Navigate to the Documents tool.
- Locate the file you want to upload a new version of.
- Hover over or right-click on the file.
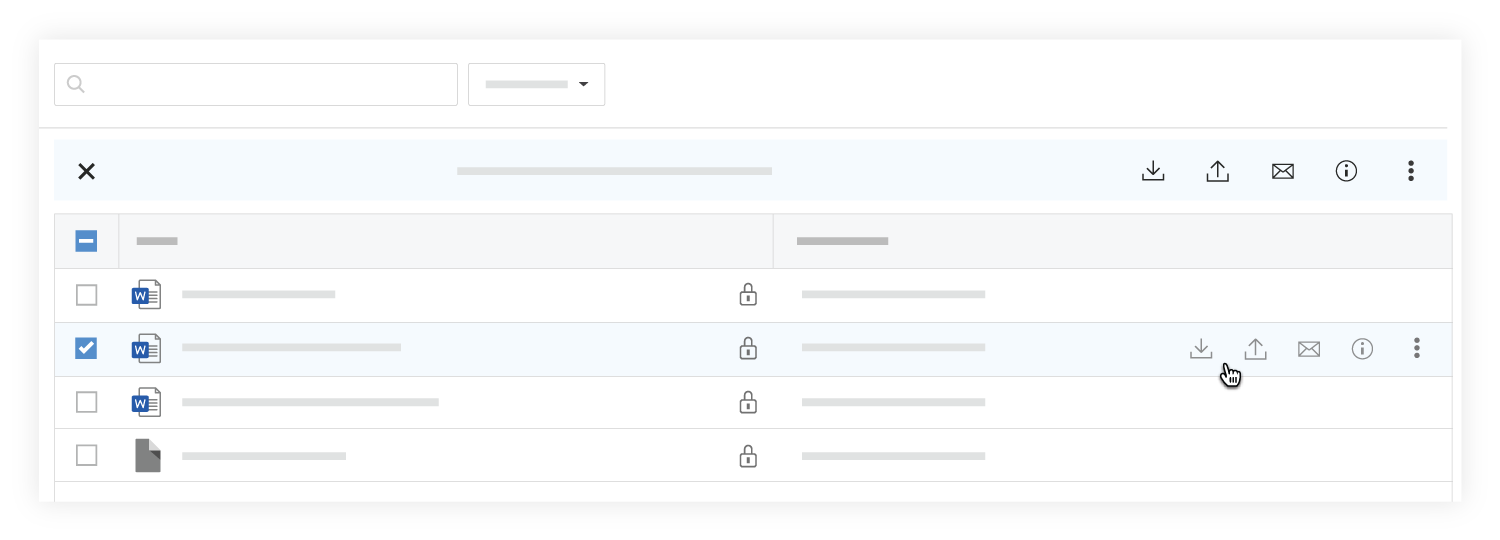
- Click New Version
 .
. - Drag and drop the file to the box under New Version.
OR- Click the box under New Version to browse for the file.
- Select the file and click Open.
- Optional: Add comments about the new version of the file.
- Click Upload.
Uploading a new version of a file into Procore (in bulk)
- Navigate to the Documents tool.
- Open the folder you want to upload files to.
- After selecting files on your computer, drag and drop them to the centre panel of the Documents tool.

OR- Click the + New drop-down menu and select File Upload.
- Select the files you want to upload from your computer.
- Click Open.
- A window opens with a message that files with the same name already exists in the folder.

- Ensure any files you want to upload new versions of have Upload as new version selected.
- Click Continue Upload. Note: The files automatically begin uploading as new versions.
Uploading a new version of a file into Procore (via an integration)
To upload a new version of files when using a smart integration with your file storage solution, you can upload the new version directly to your cloud storage folder and this will auto-update in Procore.
As an example, to upload a new file version in Google Drive and have this synced to Procore, the process is:
- Right-click the file and select Manage versions.
- Click Upload new version and select a file from your computer.
- When the new version is done uploading, click Close.
The process is similar on all major file storage platforms.
Managing Procore Folders
Creating a new folder in Procore through Document tools
- Navigate to the company’s Documents tool.
- Select the folder you want to add a folder to.
Note: You cannot create new folders for Project level documents while in the Company level Documents tool. To add new folders to a project, navigate to the project’s Documents tool. - Click the + New drop-down menu
- Click Create Folder.
- Enter a name for your folder.
- Click Create.
Creating a new folder in Procore (via an integration)
To create a new folder in Procore using an integration, you can simply create a new folder in your cloud storage app and this will be synced across to Procore.
As an example, adding a new folder in Google is as simple as:
- On your computer, go to drive.google.com.
- On the left, click New > Folder.
- Enter a name for the folder.
- Click Create.
Sharing and downloading Procore Documents & Files
You now know how to upload files to Procore and create folders within Procore. The next thing you’ll want to do is share your Procore files and folders with other Procore users and non-Procore users.
To share files and folders with others, you can manage the permissions on the file or folder. By altering these permissions, you can grant access to your files and folders to Procore users, permission groups or distribution groups.
Sharing Procore files and folders from within Procore
The process for granting these permissions in Procore are:
- Click Manage Permissions.

- Select which users, permissions groups, and distribution groups you want to grant access to:
- Mark the checkboxes next to those you want to grant access to.
- Clear the checkboxes next to those you want to remove access from.
- Click Update to save the permission settings for the file or folder.
Sharing Procore files and folders (via an integration)
To share Procore files and folders when using an integration, you can simply share your synced files from your cloud storage app. The bonus to this type of sharing is the granular sharing permissions you have access to i.e. sharing so people can view only, comment only or become an editor.
As an example, sharing a folder in Google is as simple as:
- On your computer, go to drive.google.com.
- Click the folder you want to share.
- Click Share
.
- Under “General access,” click the Down arrow
.
- Choose who can access the folder.
- Tip: If you use your Google account for work or school, you can choose to only share files and folders with a specific audience, like your department. You might see a description of each audience when you hover over the group name.
- To decide what role people will have with your folder, select Viewer, Commenter, or Editor.
Downloading Procore files and folders from within Procore
To download an individual file from within Procore, follow these steps:
- Navigate to the Documents tool.
- Right-click on the file or folder you want to download.
Note: You can also access actions by hovering over or selecting the file or folder. - Click
 Download. Note: The file or folder will begin downloading to your computer.
To download multiple files or folders from within Procore, follow these steps:
- Navigate to the Documents tool.
- Locate the files or folders you want to download.
- Mark the checkboxes next to the files and folders you want to download.
- Right-click on the file or folder you want to download.
Note: You can also access actions by hovering over or selecting the file or folder. - Click
 Download. Note: The files will begin downloading to your computer in a ZIP file.
Downloading Procore files and folders (via an integration)
To download Procore files and folders when using an integration, you can simply download your synced files from your cloud storage app.
As an example, downloading a file or folder from Google is as simple as:
- Go to drive.google.com.
- Click a file to download.
- To download multiple files, press Command (Mac) or Ctrl (Windows) > click any other files.
- Right-click > click Download.
Should you use an integration to sync your company documents?
Throughout this article, we’ve looked at the ways to upload, manage, share and download files with Procore and using smart integrations. For some companies, Procore’s in-built tools for construction file management are sufficient but we’ve found, for most companies who already use one of the major cloud file storage solutions, they need more flexibility. Whether your company uses Dropbox, Google Drive, OneDrive, SharePoint or Microsoft Teams, having a powerful integration in place cuts down on training costs, process updates and downloading & uploading files manually.
If your team is looking for a robust construction file management solution and can see the benefit of keeping your existing cloud storage app as your single source of truth, speak to one of our sales team today to assess whether one of our integrations will make managing documents in your company simpler.
